Table Maintenance Window
Agate III supports SQL table maintenance using four types of windows: single table maintenance, one to many table maintenance, complex list table maintenance, or custom panel maintenance. All maintenance windows have a consistent 'look and feel'.
'Maintain chart of accounts' is an example of single table maintenance window; 'Maintain unposted journal entries' is a one to many maintenance window; 'Maintain multi-level bill of material' is a complex list table maintenance; and 'Maintain a user's global properties - user' is a custom panel maintenance window.
One to Many Maintenance Window
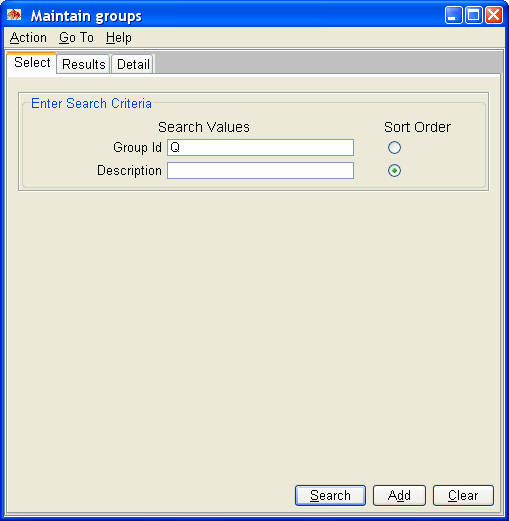
Single and one to many maintenance windows contain three tabs: 'Select', 'Results', and 'Detail'. When a maintenance window opens, the 'Select' tab is displayed with the cursor positioned in the first search field.
You can enter one or more search keys to retrieve a list of qualifying rows using the 'Search' button. You may also select the sequence for the rows to be displayed using the 'Sort Order' radio buttons.
The default button is always highlighted with a blue edge. In this case it is the 'Search' button, so pressing the enter key initiates a 'Search' action. One should find little need for using a mouse when doing routine tasks with maintenance windows.
Use the 'Add' button to go to the 'Detail' tab to add a new header row and detail row(s).
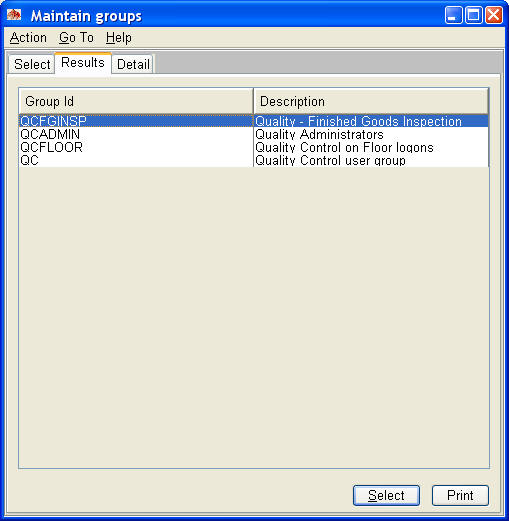
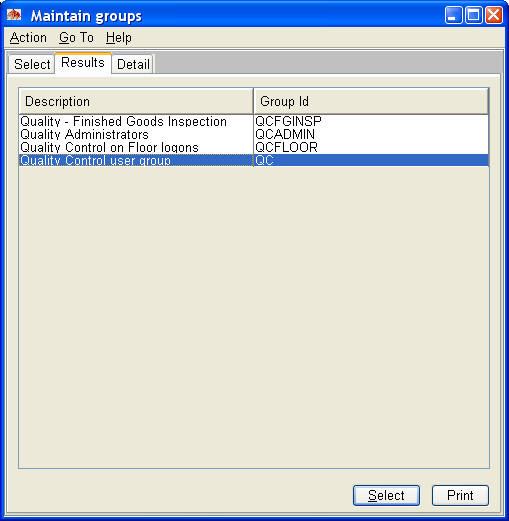
If only one row meets the search criteria, that row is displayed on the 'Detail' tab; otherwise a list of rows is displayed on the 'Results' tab.
On the 'Results' tab, highlight the row of interest and use the 'Select' button to display the 'Detail' tab for that row. You may also double click the row to go to the 'Detail' tab..
On the 'Detail' tab, you can change header fields or select one of the existing detail rows to display with the 'Select Row' button. Use the F5,F6, F7, and F8 function keys to navigate forward or backward through the rows of the 'Results' tab.
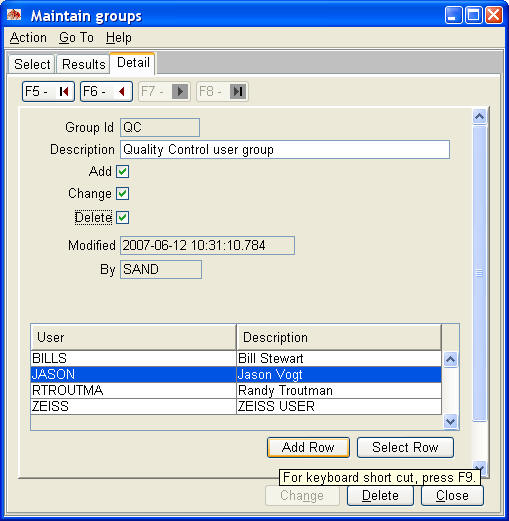
The 'Add Row' button displays a dialogue for adding a new row.
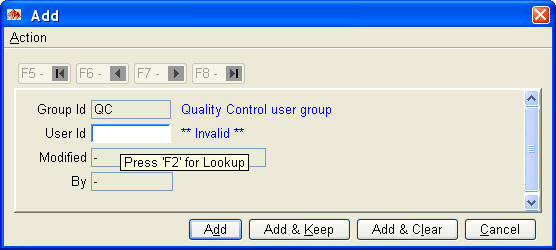
Note the blue banding on the 'User Id' field. This indicates the field is supported by a look up action for finding valid values using function key 2 (F2). Note also the tooltip help. Tooltip help displays whenever you hover the cursor over a field, and is used extensively throughout Agate III.
Pressing F2 displays the following 'Look Up' dialogue. Indicate whether to search by 'User Id' or 'Description' and enter a search value. Pressing the 'Search' button displays a list of qualifying rows for your selection. Make your selection and press 'Ok'; the selected value is automatically placed into the field.

After completing all the fields on the add dialogue, press the 'Add' button to close the dialogue. Note, this does not add the row to the database. That happens when you press the 'Add' or 'Change' button on the 'Detail' tab, causing the header row and detail row(s) to be updated as one logical unit of work, thus insuring the integrity of the database.
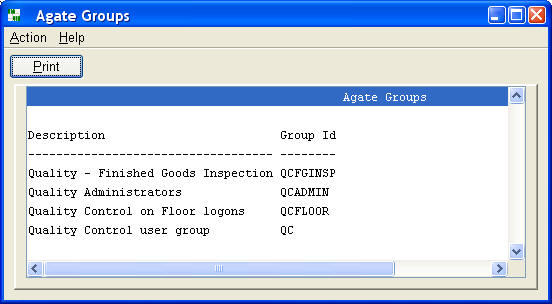
Printing the Results Tab
The 'Results' tab may be printed using the 'Print' button. Before pressing the button, you may rearrange the columns by dragging the column description. Note below how the description column has been moved to the left as the results were displayed in that sort order.
The report displays in a preview window for your review before printing. 'Results' tabs with many columns will often have there data truncated making reading it difficult; previewing a report is a good way to read and review the results tab more easily.